• Home
  • Portfolio
    • My Projects
    • My Gallery
  • About
  • Contact
RESUME

My professional work, and my personal work.

This page is to showcase my creative achievements both for myself and during professional tasks. I have also wanted to show just how I develop them from concept to render.

Nuh Nuh Nuh Nuuuuhhh Nuh!!! Behold the rocket powered Tank/Car.

When I began my degree, I only knew I wanted to be involved in the makings of video games, whether that be as a programmer, UI designer, or Animator. But when taking a Game Art Class, I was required to create a Game Prop, Vehicle or Character this is what I came up with:
Though it may look rough to me now. it was my start. This is the model that put me on my current trajectory to being involved in models and assets for film and games. After a year of more learning, I returned to this concept with the desire to do it better, Batman is one of my favourite characters after all, so I had the urge to do it properly.

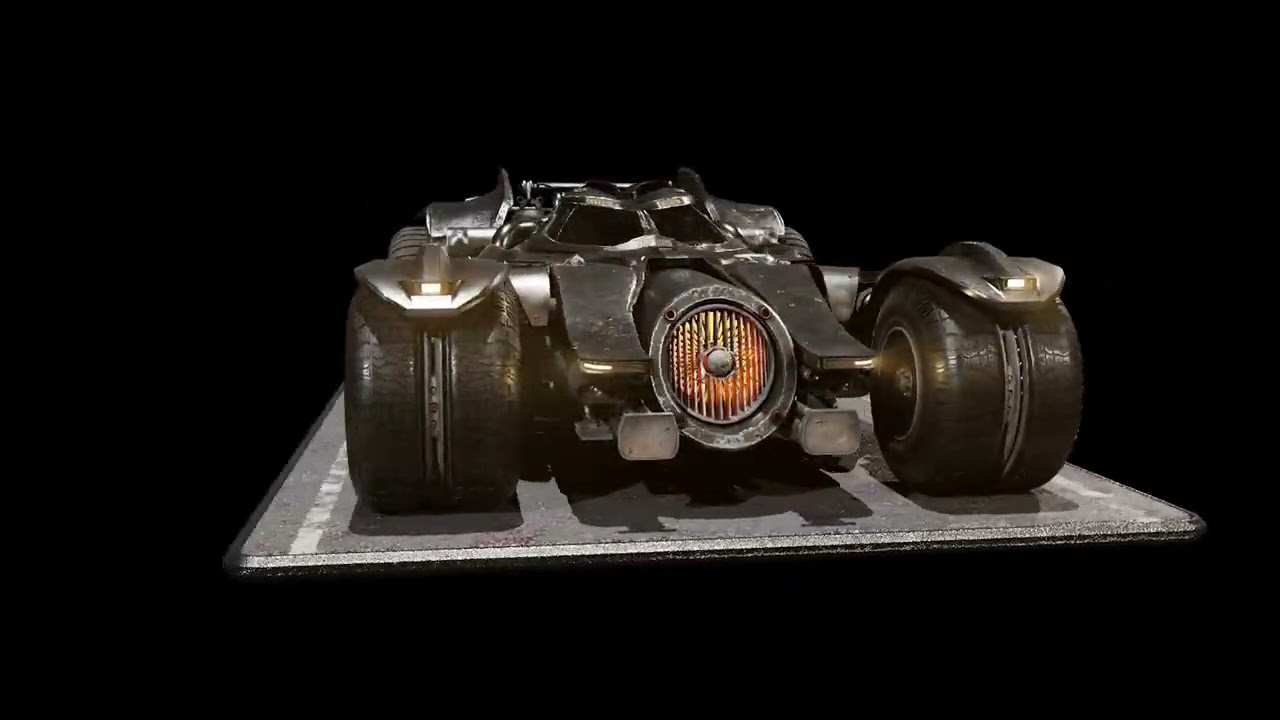
The Batmobile - MK II

How i made it.

As this project is a Hard-Surface model, I didn't need ZBrush. Using Maya I: - Modelled. - UV Unwrapped. - Animated. Substance Painter and Photoshop are how I created Textures. And using Marmoset, I was able to improve my renders.

Video can’t be displayed

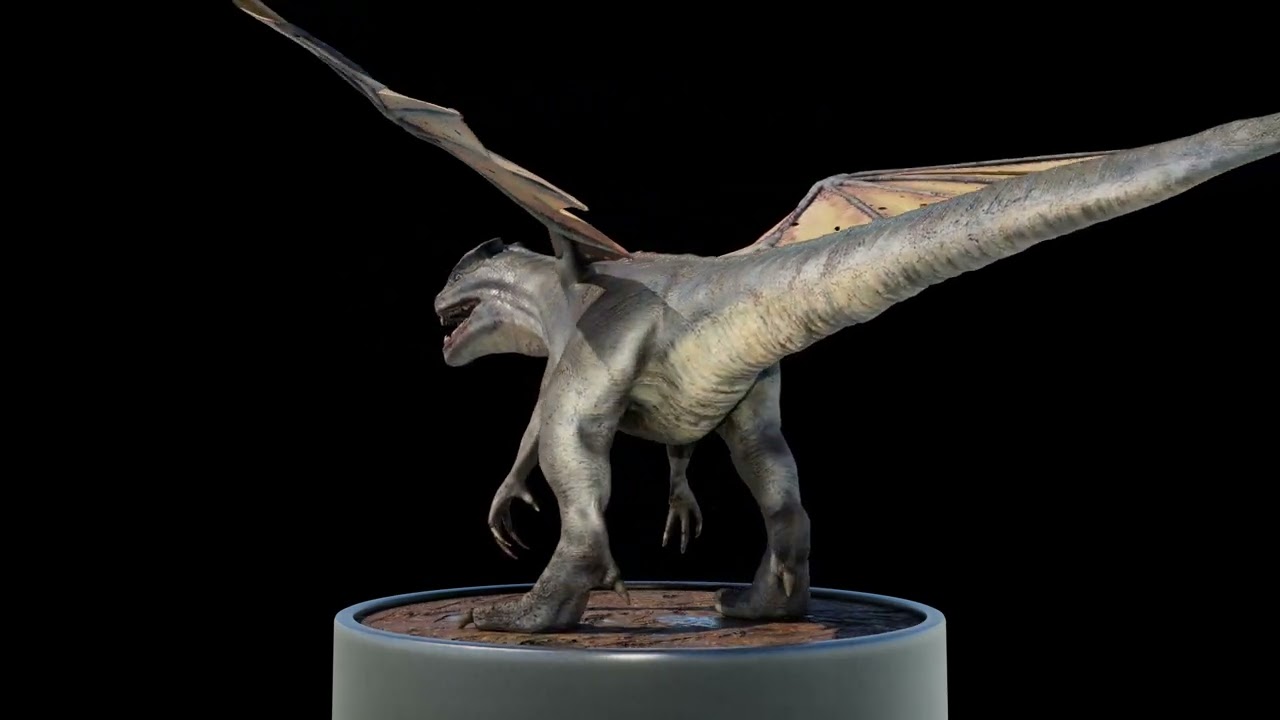
Fear, the monstrous man Eating Beast. A T-Rex? No... A T-Rex with Wings

This 3D model of a winged dinosaur is inspired by Tog, Mightor's sidekick, a show my dad loved. I wanted to capture Tog’s strength and loyalty, blending a prehistoric creature with wings for an intimidating, and realistic look. It’s a fun tribute to the character and a show that my dad cherished.
Though I find most of my hard-surface models to be strongest area, The HellaTog beast is still proof to me that I can make effect organic models and is proof that I can improve in the area as well. I am so confident now with Organic modelling that I am sure I can achieve any design required for me to complete, but efficiency is where I must improve.

Hellatog Beast Turnaround

How i made it.

Using ZBrush I modelled a full High poly, organic model. And then for a Low-poly, I used ZRemesh in the app and then exported to Maya in order to do a manual retopology. With the low Poly, I unwrapped in Maya too and then textured it using Painter and Photoshop. I even developed a rig in Maya to animate it into different positions.

Video can’t be displayed

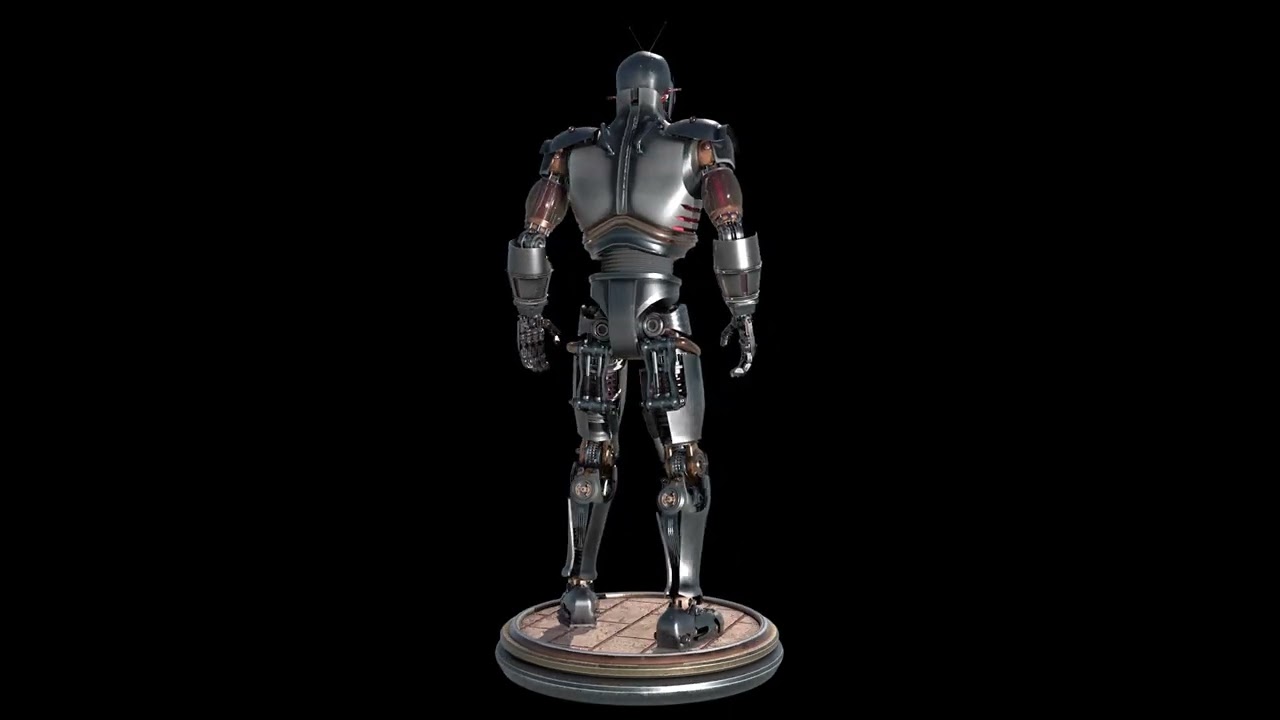
Is it a man? a robot? a Man in a Suit? Body Horror meets Atom -punk.

The thing that drew me to this type of work was the Transformers movies. So, it was only a matter of time before I would develop my own robot design. jACK is the first step for me to develop my own series following a character who witnesses different eras of Australia. but one of my favourite aesthetics is the 1950s perception of sci-fi, the Atom-punk style used in franchises such as The Jetsons, and Fallout.
My idea behind jACK was to create a robot that was in the realms of Robocop when it came to body horror but still carried the vibe of an Assaultron from the Fallout Franchise. I believe I have been able to achieve it perfectly.

jACK Renders

How i made it.

Maya may have been my most utilised program for this project, but I still used ZBrush as this project required me to create organic organs such as a skull, heart, and brain. Using photoshop for this project helped me create textures that gave a realistic yet stylised feel as I could make adjustments with them.

Video can’t be displayed

I really want to stay at your hideout. My cyberpunk themed environment.

I wanted to develop an environment to show my skills at bringing many props and assets together. I chose the near futuristic aesthetic of Cyberpunk as I had recently fallen in love with Cyberpunk 2077. One of my favourite games of all time.
My love for the game opened my eye to the genre and it's 80's futuristic style. For this project my goal was to effectively utilise real Australian culture and brands in a way the game does. I even created a light from Melbourne and the cyberpunk aesthetic, and created a projected hologram of the movie, Bullitt.

Hideout Renders and Assets

How i made it.

Maya was my primary program for this project again. It was easy for me to pull multiple assets together. Using Substance painter and Photoshop I created all the textures. Photoshop was also the sole way I created emissive textures and lights.

My current Personal Project

As proven by much of my work... I love Transformers. I have done a few concepts of famed characters, but currently I am working towards bringing the concept I did of my original Transformer i have named River. River is a character who I always imagined ever since my father brought home his Ford GT 40. Given time, I aim to bring River to life in a small film of him transforming through composition.
My Projects
About
Contacts
0439032702
declanodempsey@gallantroad.com
Copyright © 2025. All rights reserved.

We use cookies to enable essential functionality on our website, and analyze website traffic. By clicking Accept you consent to our use of cookies. Read about how we use cookies.

Your Cookie Settings

We use cookies to enable essential functionality on our website, and analyze website traffic. Read about how we use cookies.

Cookie Categories
Essential

These cookies are strictly necessary to provide you with services available through our websites. You cannot refuse these cookies without impacting how our websites function. You can block or delete them by changing your browser settings, as described under the heading "Managing cookies" in the Privacy and Cookies Policy.

Analytics

These cookies collect information that is used in aggregate form to help us understand how our websites are being used or how effective our marketing campaigns are.